From idea to tileset in minutes
Follow these simple steps to create professional-quality game tilesets with AI. Your vision, perfectly tiled.
Create your project
Sign up and create a new tileset project. Choose your grid size and get ready to bring your vision to life.
- Start with a descriptive project name
- Choose grid size based on your game needs
- Projects auto-save to the cloud
New Project
Give your project a name to get started.
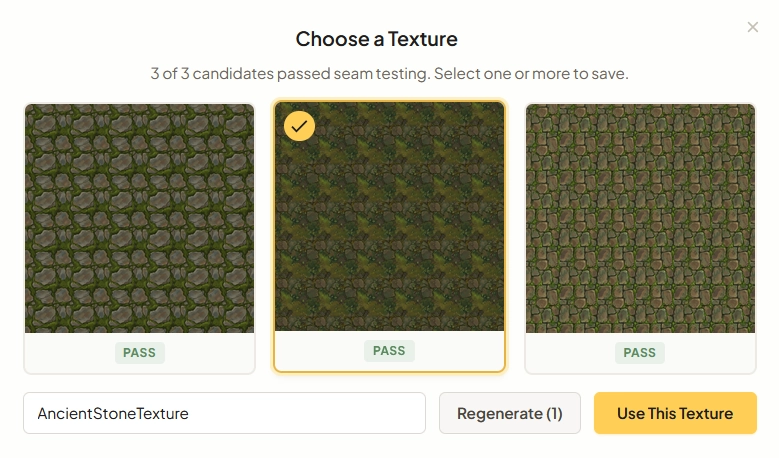
Generate a base texture
Describe what you want or provide reference images. Tilewise generates 3 parallel candidates, each automatically seam-tested. Pick the best ones or regenerate.
"Ancient stone floor with moss growing between cracks"
- Upload up to 2 reference images for style blending
- 3 candidates generated in parallel — pick the best
- Every texture is automatically seam-tested before selection
Select grid cells
Click cells on the grid for quick placement, or switch to free placement mode to drag pixel-perfect rectangles anywhere on the canvas. Select multiple cells by clicking and dragging to cover larger areas.
- Click individual cells for precise placement
- Free placement mode for pixel-perfect positioning
- Drag to select rectangular areas

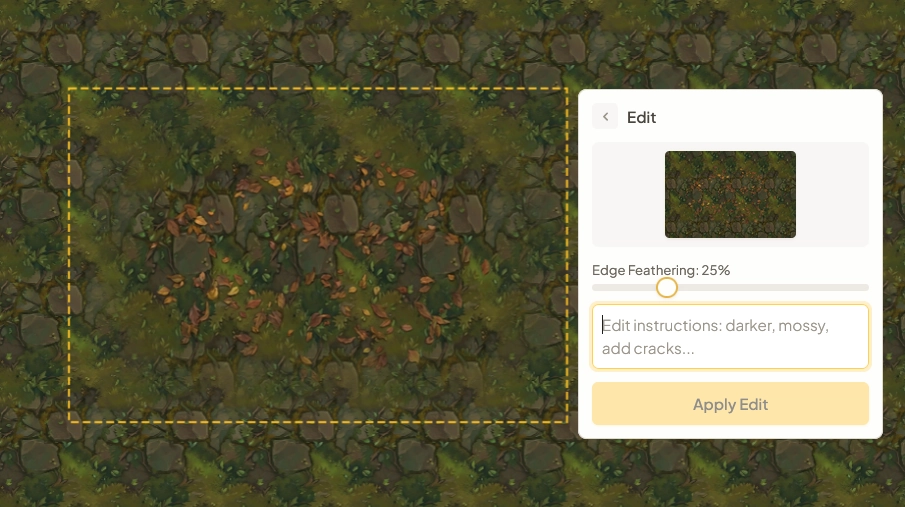
Generate features
Describe what you want on the selected area. Refine conversationally — "Make it darker, add cracks" — with full version history and undo/redo.
"Scattered leaves"
- Conversational refinement across multiple turns
- Full version history with undo/redo
- Add reference images for style matching
Compose & export
Arrange hero tiles in the scene editor, generate complete autotile sets, then export ready-made files for your game engine.
- Scene editor with 4-64 grid for composing levels
- Autotile/Wang sets with interactive paint preview
- Export for Godot, Tiled, and JSON
- PNG, spritesheets, and hero tile collections
Get the best results
Expert advice for creating stunning tilesets
Use reference images
Upload images that capture the art style you're going for. Reference images guide the AI and help keep your textures visually consistent across the project.
Start with base texture
Always generate your base texture first. Features are designed to blend seamlessly with whatever base you've created.
Be descriptive
The more specific your prompts, the better the results. Include materials, colors, style, and mood.
Iterate quickly
Don't aim for perfection on the first try. With 3 candidates per generation and automatic seam healing, it's faster to regenerate than to overthink your prompt.
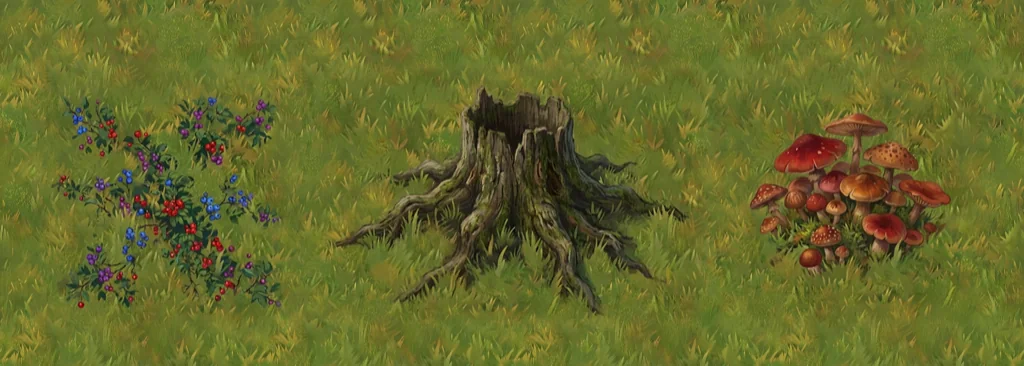
Creating a grass field tileset
Base Texture
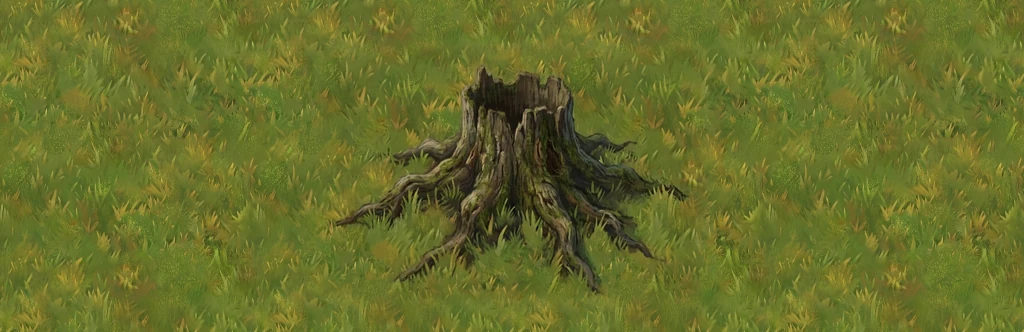
Add Tree Stump
Add Details